(Part 1) Build Steem blockchain application with Vue.js: installation and first demo

Repository
Vue.js: https://github.com/vuejs/vue
What Will I Learn?
- Vue.js development environment setup
- Build first Vue.js application
- Interact with Steem blockchain in Vue.js application
Requirements
- A Node.js environment (Ubuntu 18 + Node.js is used in this tutorial)
- Basic HTML/CSS/Javascript knowledge
Difficulty
Basic level
Preparations
In order to implement the demo application, you need the Node.js environment. Run this command:
node -v
The output should look like:
v11.10.0
If you do not have Node.js installed, make sure get it installed before following this tutorial. Node Version Manager is highly recommended to install/manager your Node.js.
Tutorial Contents
In this tutorial, first you will learn how to setup the Vue.js development environment, then you will learn how to read user profile from Steem blockchain and display these information by using Vue.js (The demo can be seen from: https://vuejstutorials.herokuapp.com).
Install Vue-cli
Run this command to install Vue-cli:
npm install -g vue-cli
Create a project:
First you need to create a Vue.js project, e.g.
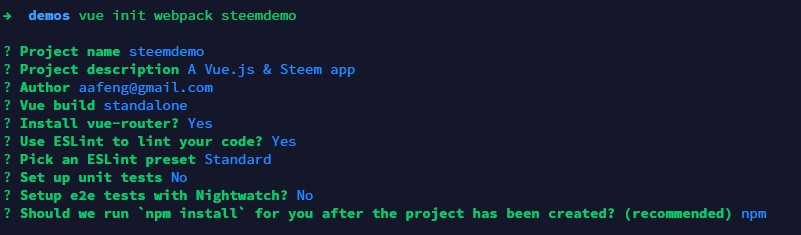
vue init webpack steemdemo
You will be asked some questions while creating the project, just choose the default values as shown below (Choose ‘No’ for tests as it will be covered later):
Now we are ready to test the demo project, type the following command:
cd steemdemo
npm run dev
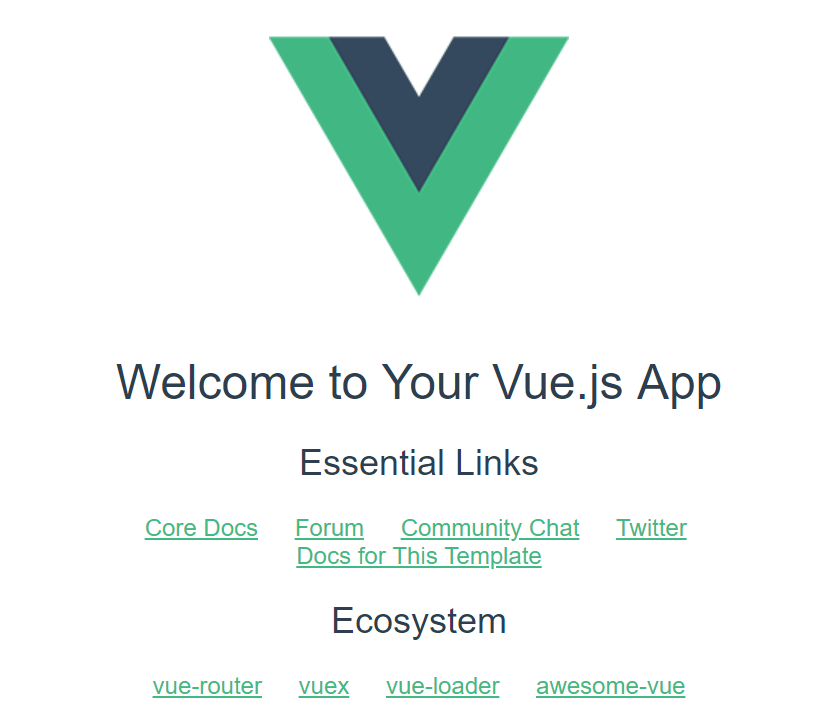
Open your browser and enter http://localhost:8080 (OR http://YOUR_HOST:8080), you will see this page:
You will find the following sub folders have been created in your project folder:
- build: this folder contains the webpack settings
- config: this folder contains project settings
- node_modules: this folder contains all required Node.js modules
- src: this is the source code of your project
- static: the static assets in your project
The ‘src’ folder will be the main folder you will be working on, type this command:
tree src
You will see output as shown below:
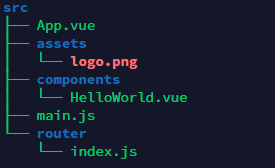
‘App.vue’ is the main component of your application and ‘main.js’ is the entry point of your application. All routes are defined in router/index.js. A ‘HelloWorld’ component has been generated in components/HelloWorld.vue.
Read user profile from Steem blockchain
Now, the generated Vue.js scaffolds needs to be modified to read a user’s profile from Steem blockchain and show these information in the page, as shown below:

Install steem js
First, you need to install steem module
npm install steem --save
Add Profile.vue
Rename components/HelloWorld.vue to components/Profile.vue and update its content as shown below:
<template>
  <div class="container">
    <div  class="profile_header" v-bind:style="{backgroundImage: 'url(' + profile.cover_image + ')'}">
        <img class="profile_avatar" v-bind:src="profile.profile_image"/> {{profile.name}} <br/>
        <div>About: {{ profile.about }}</div>
        <div>Location: {{ profile.location }}</div>
    </div>
  </div>
</template>

<script>
let steem = require('steem')

export default {
  name: 'Profile',
  data () {
    return {
      profile: ''
    }
  },
  created () {
    let names = ['aafeng']
    let currentComponent = this
    steem.api.getAccounts(names, function (err, result) {
      if (err) {
        console.log(err.stack)
      }
      var jsonMetadata = JSON.parse(result[0].json_metadata)
      currentComponent.profile = jsonMetadata.profile
    })
  }
}
</script>

<style scoped>
.profile_header {
  padding: 10px;
  background-size: 100%;
}
.profile_avatar {
  height: 30px;
  width: 30px;
}
</style>
Profile.vue has three parts: template, script, and style.
template
The template is mainly HTML tags, plus Vue.js directives to link data to its display elements, and Vue.js interpolation to show some values in the page.
For example, the following code means that ‘profile_image’ property of ‘profile’ is linked to the img tag’s src property. Whenever the profile is loaded from Steem blockchain, the image will be loaded by Vue.js.
<img class="profile_avatar" v-bind:src="profile.profile_image"/>
Interpolation is used to display texts in the template:
{{profile.name}}
{{profile.location}}
script
Within the script tag, Vue.js component is defined, e.g. with name, data, and created function. The data defined in the data function can be used in the template. The empty string has been used as the default value of ‘profile’. ‘created’ function is used to initialize the profile, e.g. read user’s profile from Steem blockchain and save jsonMetadata into profile of current component. Note: in this demo, a hardcoded username, e.g. ‘aafeng’ is used, but it will be changed later.
style
The style tag’s name explains the purpose of it, e.g. defining the CSS styles which are used in the current component.
router/index.js
Now you need to update router/index.js with the following content:
import Vue from 'vue'
import Router from 'vue-router'
import Profile from '@/components/Profile'

Vue.use(Router)

export default new Router({
  routes: [
    {
      path: '/',
      name: 'Profile',
      component: Profile
    }
  ]
})
In the code above, Profile is registered first:
import Profile from '@/components/Profile'
Then routes are modified because Profile will be used as the homepage:
  routes: [
    {
      path: '/',
      name: 'Profile',
      component: Profile
    }
  ]
Now you can run this command to launch your application:
npm run dev
Open your browser and access: http://YOUR_HOST:8080 (In my case, it is http://localhost:8080) and you will see the your first demo!
Curriculum
This is the first tutorial. More interesting topics will be covered in the following tutorials!
Proof of Work Done
Source code for this tutorial: https://github.com/aa-feng/VuejsTutorial/tree/v0.11
Master branch of the source code (will be updated with ongoing tutorials): https://github.com/aa-feng/VuejsTutorial
The live demo of latest iteration: https://aa-feng.github.io/


Comments